

Introduction
Some find curl statements and the command line, used for many of the examples in our platform APIs documentation, difficult and intimidating. For those, there are numerous tools to send HTTP requests to REST-based services, which include most of the Brightcove APIs. This document will show you how to use one popular tool, the Insomnia app.
Install Insomnia
Get Insomnia from https://insomnia.rest. Insomnia can be installed on Mac, Linux, or Windows systems.
Authentication
Insomnia can be used to make requests to any of Brightcove's RESTful APIs. Most of the APIs use OAuth2 for authentication, and we will see how to set that up in Insomnia later in this document. However, you can also use it for the APIs that do not use OAuth, by simply setting the appropriate header.
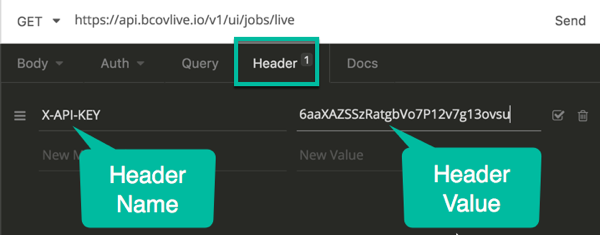
Here is what that header will look like for requests with authentication methods other than Oauth2:
- Playback API
-
BCOV-Policy: YOUR_POLICY_KEY - Live API
-
X-API-KEY: YOUR_API_KEY - Zencoder API
-
Zencoder-Api-Key: YOUR_API_KEY
Get client credentials
To work with most of the Brightcove APIs, you will need client credentials for the account and API(s) you wish to use. Get your client credentials in Studio by following the directions in Managing API Authentication Credentials. In the steps below, we will make CMS API requests using Insomnia, so your credentials should have at least the following permissions:
- Videos: Read/Write
You can add as many additional permissions as you like to get credentials that will be usable for a wider range of API requests. Also note that you can get credentials that will work for multiple accounts if you like.
Using Insomnia
Once you have your client credentials, you are ready to start using Insomnia. Insomnia will do a lot of set-up work for you if you import the OpenAPI specification for the CMS API, which we make available to you .The steps below walk you through making some CMS API requests using Insomnia.
Setting up an Insomnia collection for the CMS API
Get the OpenAPI specification for the CMS API
- Open the CMS API Reference.
-
Click the Download button and save the
openapi.yamlfile in a place where you can find it again: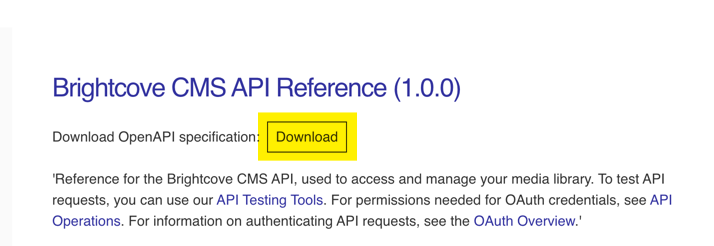
Download Open API Specification
Import the OpenAPI specification into Insomnia
- Launch the Insomnia app.
- Click the dropdown beside Insomnia and select Import/Export:
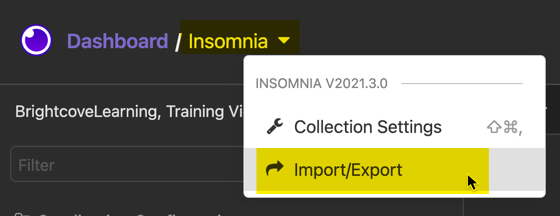
Import/Export -
In the dialog that opens, click Import Data and select From File:

Import Data from File -
Select the
openapi.yamlfile you downloaded and then choose whether to import the data into the current workspace or create a new one. Either will work, but we recommend creating a new workspace for each API:
Create New Workspace -
Next you will be asked whether to import the data as a Request Collection or a Design Document. Choose Request Collection:

Import as Request Collection - You will see a dialog confirming that the data was imported.
-
Click on Dashboard in the upper left corner to see your workspaces. If you created a new workspace, you will see it displayed with the appropriate name:
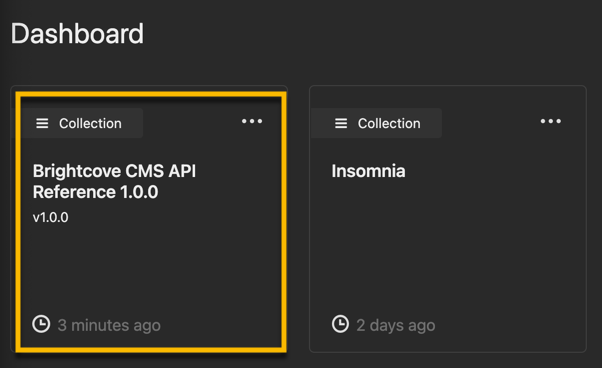
CMS API Workspace - Click on the workspace to open it.
-
You will see a list of folders that contain the various groups of requests for the CMS API, and also a new OpenAPI environment:
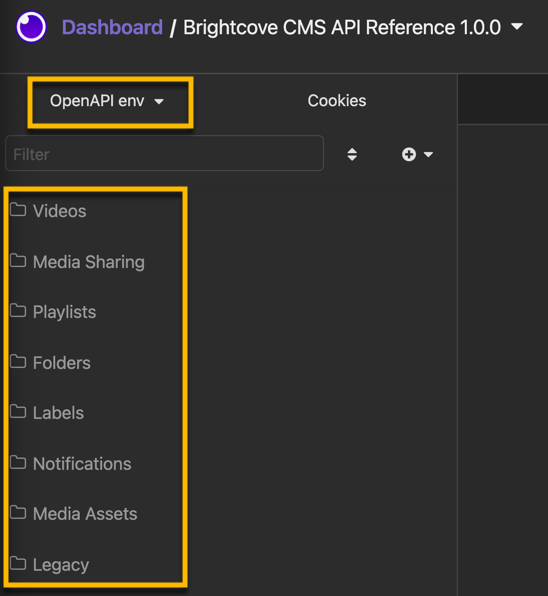
CMS API Requests and Environment
Add variables to the environment
This is an optional step, but it will simplify setting up authentication for requests later.
-
Click on the OpenAPI env dropdown menu and select Manage Environments:
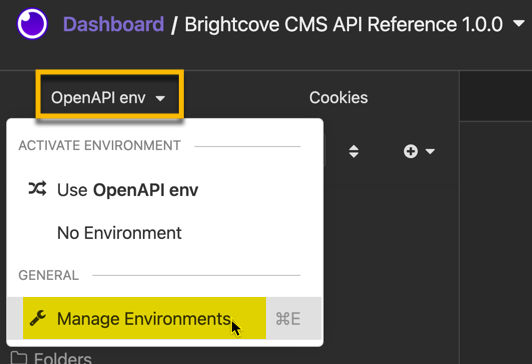
Manage Environments -
You will see the environment variables that Insomnia created from the OpenAPI spec in the form of JSON:
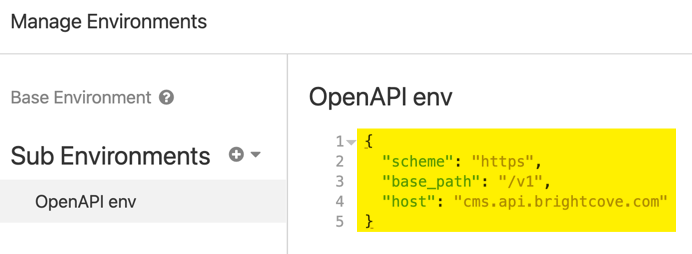
Environment Variables -
Add these additional variables to the JSON (see Get Client Credentials above on the
client_idandclient_secret):"account_id": "your_account_id""client_id": "your_client_id""client_secret": "your_client_secret""access_token_url": "https://oauth.brightcove.com/v4/access_token"
-
When you are finished, the environment JSON should look similar to this:
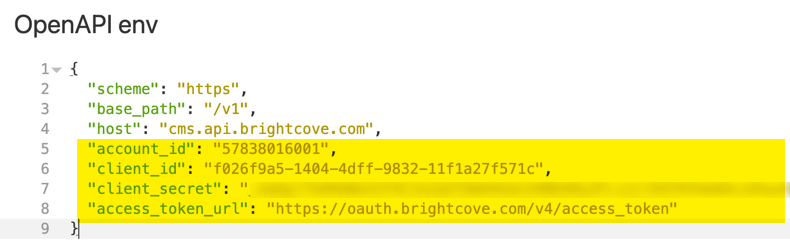
Environment Variables Added - Click Done in the lower right-hand corner to exit the dialog.
Set up authentication
Now we are ready to set up authentication for API requests.
- Click the Videos folder, and select the Get Videos:
New Request -
Notice that the URL for the request already contains two variables. If you click on these, you can see (and modify) their values.
base_urlis automatically generated by Insomnia from the OpenAPI spec. If you click onaccount_id, you should find that the value matches what you entered as an environment variable in the previous section. -
Click the Auth tab and the Auth dropdown menu, and select OAuth 2.0:
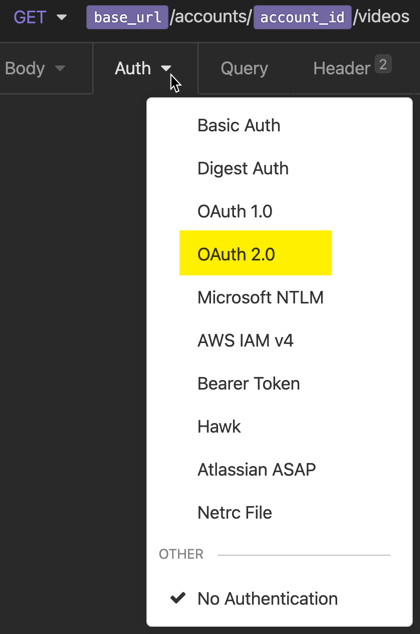
Select Auth Type -
Click the Grant Type dropdown and select Client Credentials:
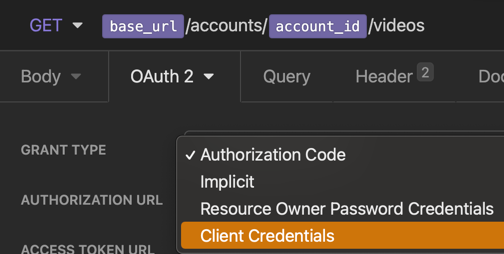
Select Grant Type -
In the Access Token URL field, start typing "access_token_url" - you will see the autocomplete menu, and select your
access_token_urlenvironment variable: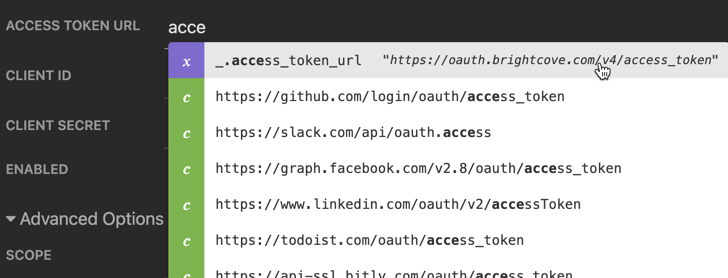
Autocomplete for Variables -
Repeat the previous step to populate the Client ID and Client Secret fields with your
client_idandclient_secretvariables: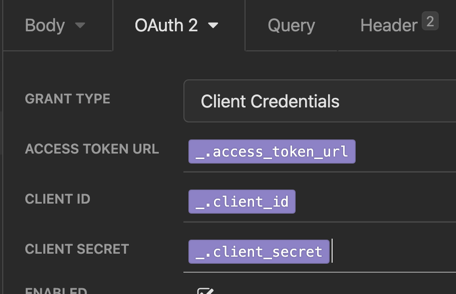
Auth Variables -
Scroll down to see the Fetch Token button and click it. Make sure you see the Access Token field populated with a token:
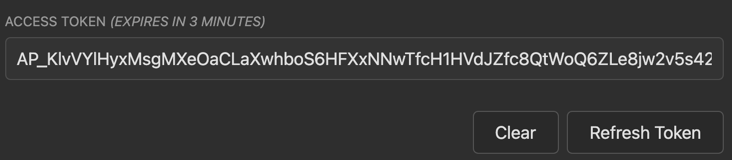
Access Token - Click Fetch Tokens to make sure this works. You should see a response like this:
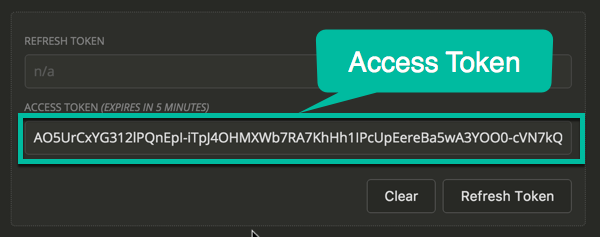
Access Token -
Go to the Header tab and delete the Authorization header (the authentication you just set up will take care of the head - this one will break it):
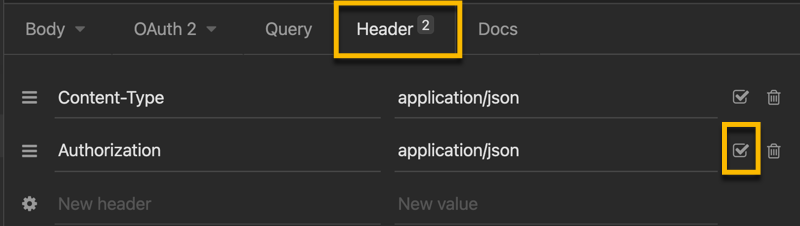
Remove Authorization Header
Make a request
Now we are ready to make a Get Videos request.
- Since this is a
GETrequest, all you have to do is click Send. -
You should see the JSON response appear in the Response area:
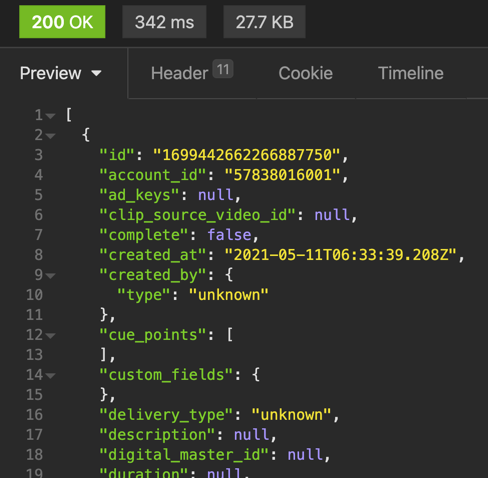
API Response -
Note that you can retrieve different sets of videos by using Query params. Click the Query tab for the request, and you will see that Insomnia has populated it based on the OpenAPI spec. Just check the param(s) you want to use and set the values:
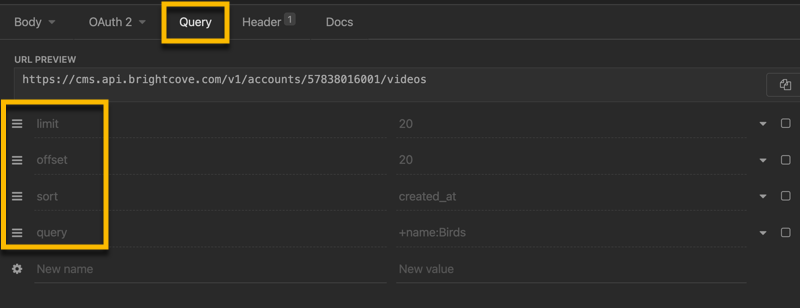
Query Params
Send a POST request
Now, we will send a POST request with some data. In this case, we will create a new video object using the CMS API. Start by selecting the Create Video request in the Videos folder.
- Repeat all the steps in the Set up authentication section above to set up authentication for this new request.
-
This request requires a request body, so click the JSON tab, and enter this JSON code to replace the
null:{ "name": "Insomnia Test" }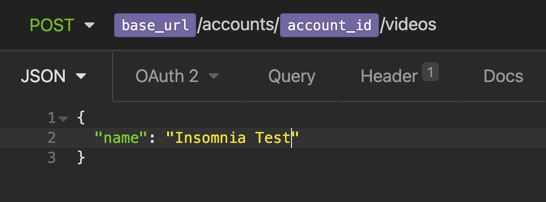
Request Body - Click Send and you should see the new video object returned in the response.
Using the code generators
Another nice feature of Insomnia is that it will generate code for making requests in many different languages.
-
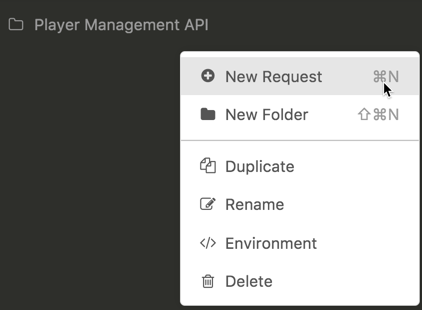
Hover click on the dropdown menu for a request:
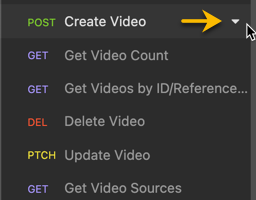
Request Dropdown Menu -
Select Generate Code from the menu:
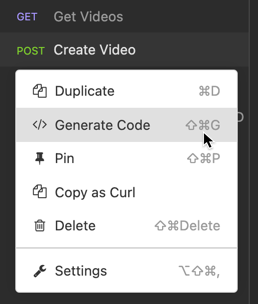
Select Generate Code -
In the Generate Client Code dialog that opens, choose the language you want code for:
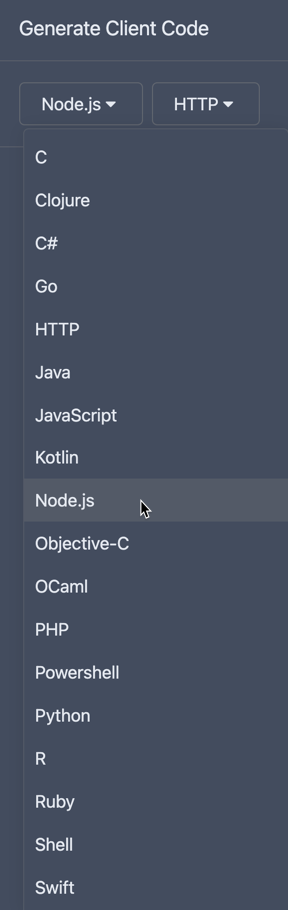
Select the Language -
For many of the languages, there are also variants you can select that may be a better fit for the kind of app you are creating:
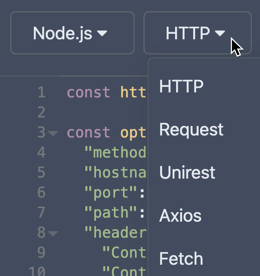
Select Code Variant -
There is also a handy button for copying the code to your clipboard:
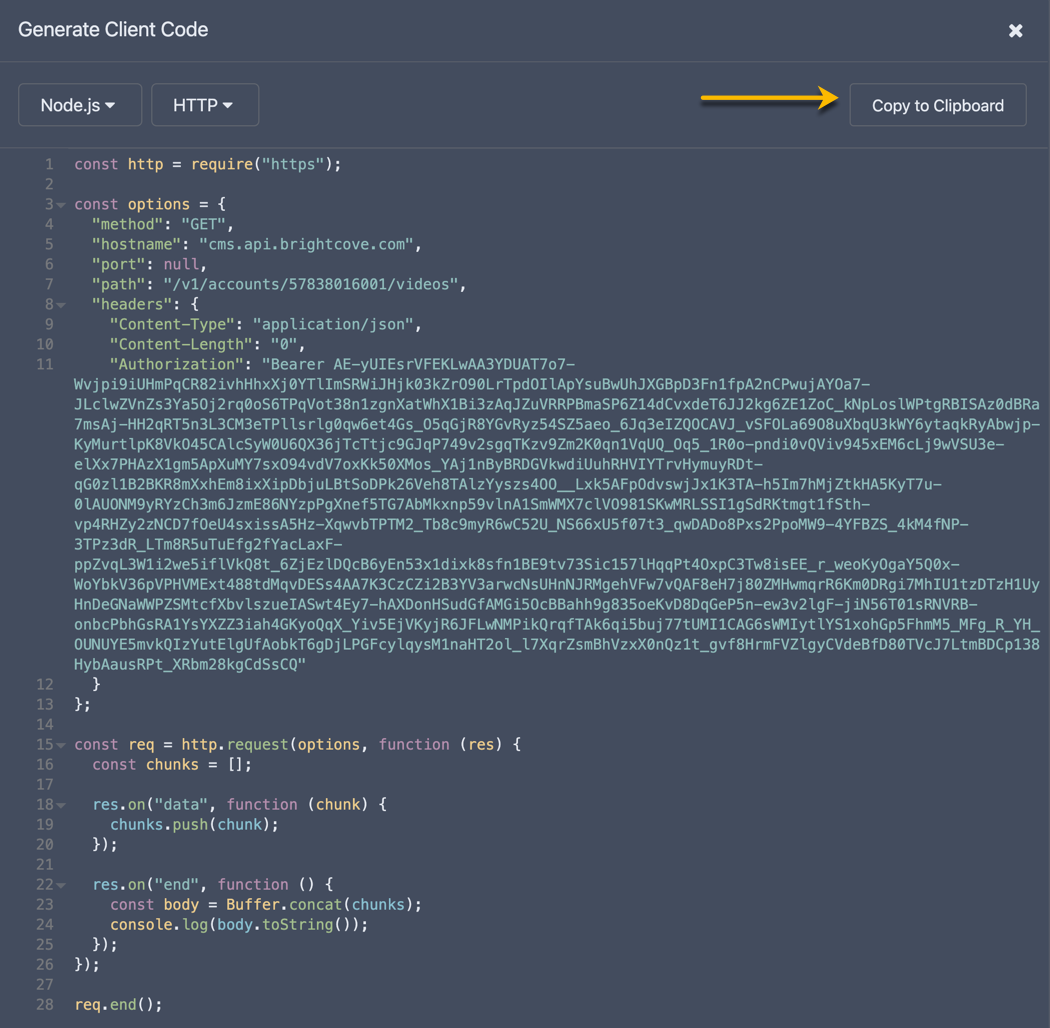
View and Copy Code
Conclusion
You now know the basics of using Insomnia to make requests to the Brightcove APIs. Note that if you choose to upgrade your free Insomnia account to a team account, you can also sync all your requests and environments and share them with other team members.