Overview
This tutorial explains at the API level how to create a live streaming job in Brightcove live and then create a frame-accurate clip from it.
Note that frame-accurate clipping requires that your encoder be sending SMPTE timecodes.
This tutorial will use curl to make the API requests, but you can easily make them in Insomnia, Postman or other REST clients instead.
Create a live job
First, we will create a live job. You will need an API-KEY for the Live API. If you do not, and are interested in obtaining access, please contact your Customer Success Manager.
- We assume you already have a brightcove acount and they you have your API-KEY, let's call it
bcov-live-api-key -
Copy and paste the following curl command into a text editor:
curl -X POST \ https://api.bcovlive.io/v1/jobs \ -H 'Content-Type: application/json' \ -H 'x-api-key: ' \ -d '{ "live_stream": true, "region": "", "outputs": [{ "label": "hls360p", "live_stream": true, "height": 360, "video_bitrate": 365, "segment_seconds": 6, "keyframe_interval": 60 }, { "label": "hls432p", "live_stream": true, "height": 432, "video_bitrate": 730, "segment_seconds": 6, "keyframe_interval": 60 }, { "label": "hls540p", "live_stream": true, "height": 540, "video_bitrate": 2000, "segment_seconds": 6, "keyframe_interval": 60 }, { "label": "hls720p3M", "live_stream": true, "height": 540, "video_bitrate": 2000, "segment_seconds": 6, "keyframe_interval": 60 }, { "label": "hls720p4.5M", "live_stream": true, "height": 540, "video_bitrate": 4500, "segment_seconds": 6, "keyframe_interval": 60 }] }' -
Replace:
with the closest available region to your encoder, see closest available regions to your encoder. For instance:us-west-2with your Brightcove live API key. For example:abcdfeg-this-is-a-fake-api-key-FgJajjasd12hJHsZ
- After making those changes, copy and paste the code into Terminal or whatever command-line app you use and run it.
-
The response should be something like this:
  {
      "id": "3b6871bf2f344acaa6b397d09b476018",
      "outputs": [... removed for simplicity ...],
      "stream_url": "rtmp://ep1-usw2.bcovlive.io:1935/3b6871bf2f344acaa6b397d09b476018",
      "stream_name": "alive",
      "static": false,
      "encryption": {},
      "playback_url": "https://bcovlive-a.akamaihd.net/3b6871bf2f344acaa6b397d09b476018/us-west-2/NA/playlist.m3u8",
      "playback_url_dvr": "https://bcovlive-a.akamaihd.net/3b6871bf2f344acaa6b397d09b476018/us-west-2/NA/playlist_dvr.m3u8"
  }
This jobs will create 5 renditions based on Apple recommendations.
Configure your encoder
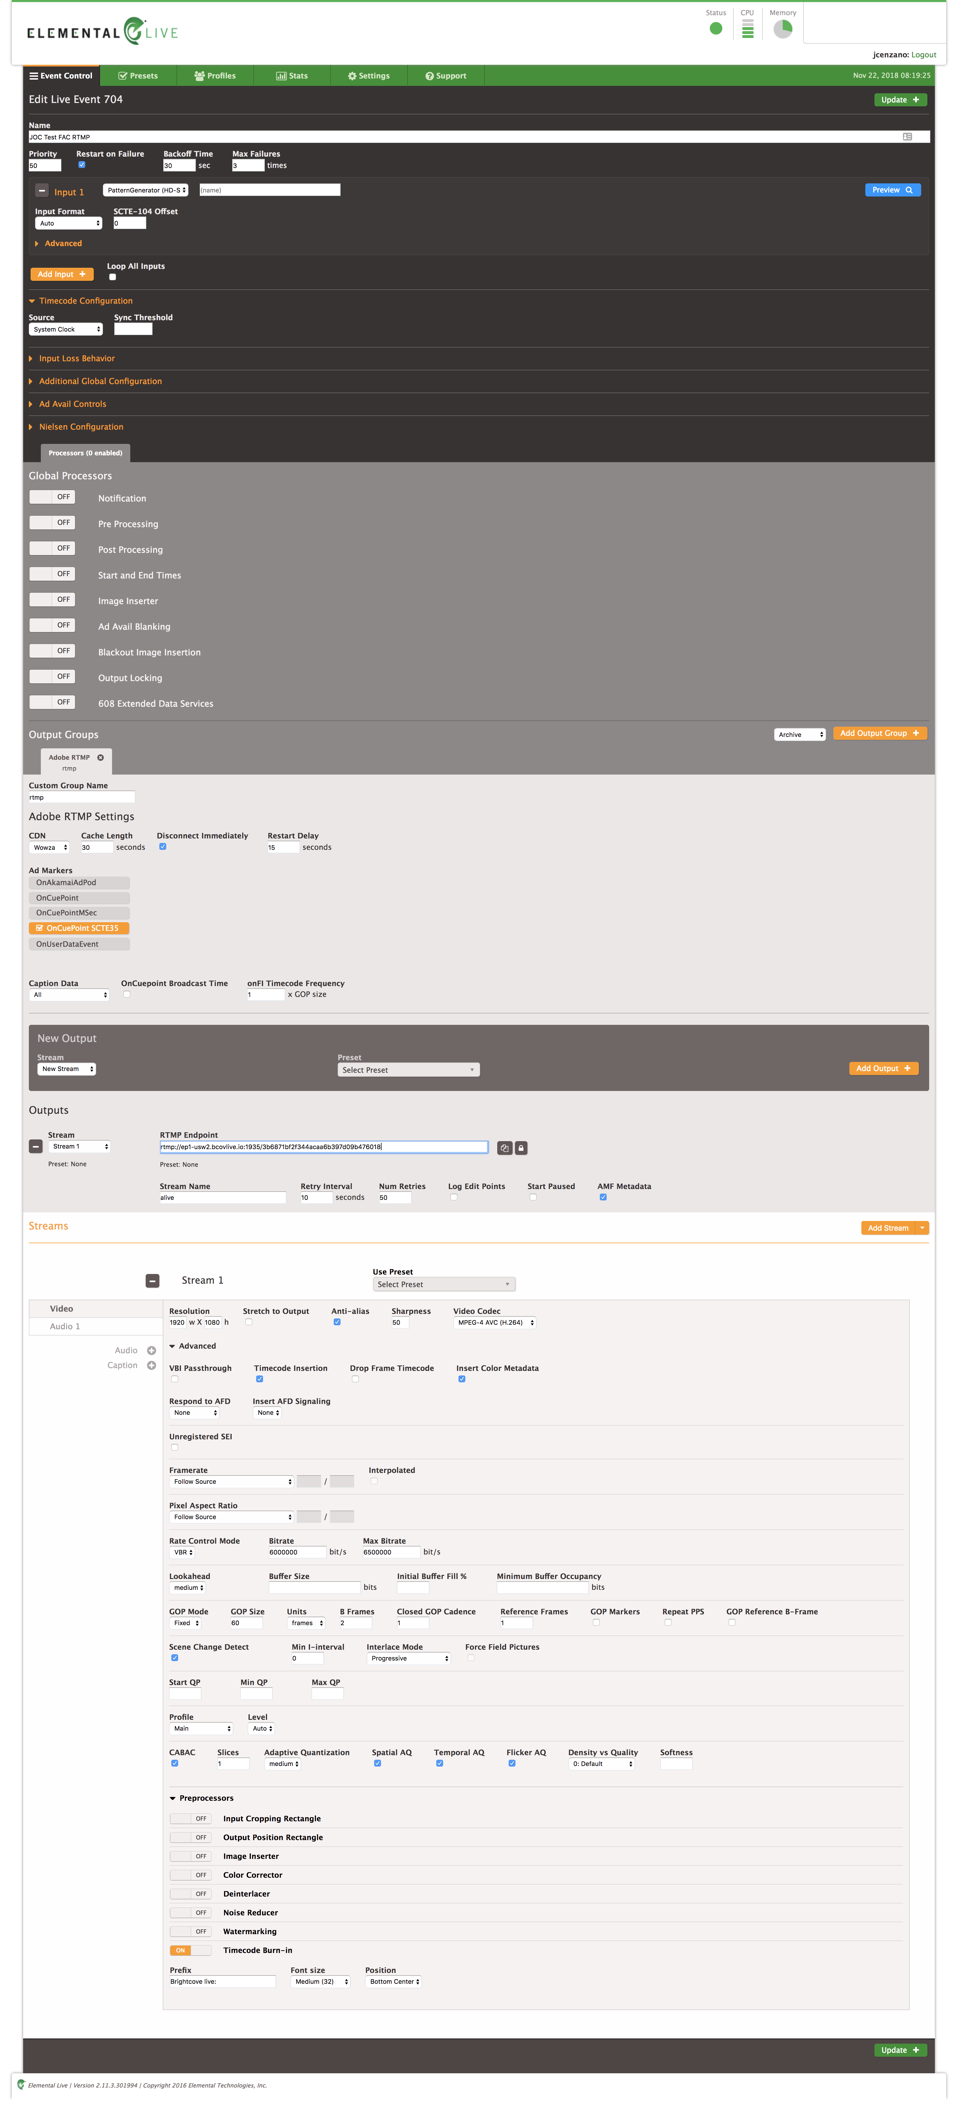
The steps shown here will assume an Elemental live box encoder, which was used in testing the steps for this tutorial. If you have a different encoder, the settings should be similar.
The most important settings for this case are:
- Configure timecode source as "system clock"
- Set "OnFi timecode frequency" to 1
- Check "time code insertion" inside video
- Strongly recommended: Framerate = follow source
This is the config we used for this experiment:

Test playback
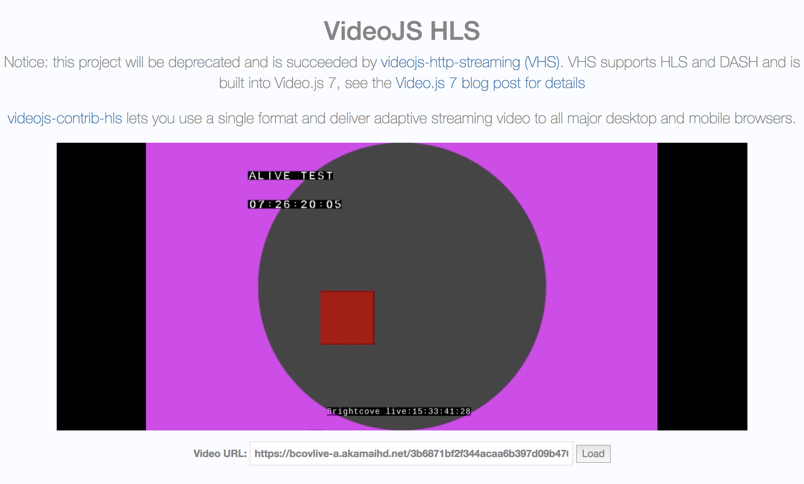
You can use this VideoJS HLS demo page to test playback, just paste the value playback_url returned in the creation job response:

Create a frame-accurate clip
In this tutorial, we will assume that you are sending the clip to your Video Cloud library. If you are sending the clip to an S3 bucket or some other location, the process is the same - there are just some minor differences in the request body for the API requests.
Credentials
If you have not created credentials for Video Cloud in your Live account, you can follow the steps here to do so. This is a one-time operation.
If you do not yet have client credentials for Dynamic Ingest of videos to Video Cloud, you will need to create them. See Managing API Authentication Credentials for instructions on how to do this in Studio.
- Copy the curl command below into a text editor:
curl -X POST \ https://api.bcovlive.io/v1/credentials \ -H 'Content-Type: application/json' \ -H 'x-api-key: ' \ -d '{ "credential_default_for_type": true, "credential_label": "Video_Cloud_Uploads", "credential_private": "", "credential_public": "", "credential_type": "videocloud" }' -
Replace:
with your Live API keywith your client secretwith your client id
- Copy and paste the edited command into Terminal or your command line app, and run it.
- The response should look similar to this:
  {
    "credential_id": "1e0180330b724dfbbcaf6b28b6c5d517",
    "user_id": "c2691d4d039040be96c190a949d754a7",
    "credential_label": "Video_Cloud_Uploads"
  }
Create the clip
Once you have your Video Cloud credentials, you are ready to create a clip.
- Copy the curl request below and paste it into a text editor:
curl -X POST \ https://api.bcovlive.io/v1/vods \ -H 'Content-Type: application/json' \ -H 'x-api-key: ' \ -d '{ "live_job_id":"", "outputs":[{ "label": "Trim by SMPTE TC 17:33:11:12 to 17:34:00:00", "stream_start_timecode": "", "stream_end_timecode": "", "videocloud":{"ingest":{"capture-images":true},"video":{"name":"test-frame-accurate-clip"}}, "credentials": "" }] }' -
Replace:
with your Brightcove live API key. For instance:abcdfeg-this-is-a-fake-api-key-FgJajjasd12hJHsZwith the job id in the response to your request to create the live job. In our example this value would be3b6871bf2f344acaa6b397d09b476018- yours will be different.andshould be values that make sense (are present) in your live stream. In our example we have used:17:33:11:12and17:34:00:00with the label for your Video Cloud credentials. If you did not already have them and created them using the steps above, this would beVideo_Cloud_Uploads
- Copy and paste the edited code into Terminal or your command line app, and run it.
- The response should look similar to this:
  {
      "vod_jobs": [
          {
              "jvod_id": "0b14a4ba326d4dd08f15053ca2a403b7",
              "label": "Trim by SMPTE Timecodes"
          }
      ],
      "live_job_id": "3b6871bf2f344acaa6b397d09b476018"
  }
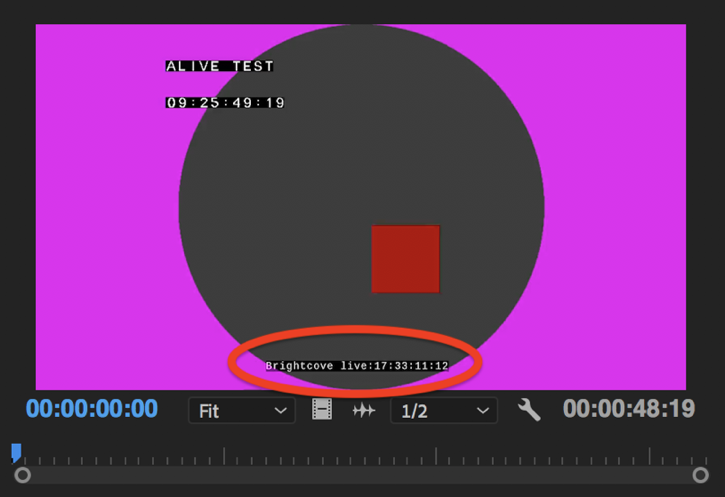
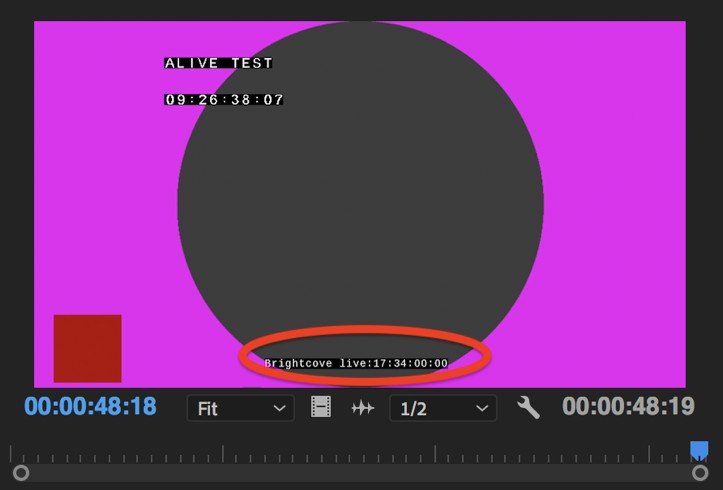
We tested the accuracy of the experiment we downloaded the clip and used Adobe premiere to checked the 1st and last frame, since the timecode is overlayed a simple visual check is enough to confirm the accuracy at input and output points:


