Introduction
Getting access tokens is a crucial operation for most work with the Brightcove APIs, as the majority of them use access tokens to authenticate requests.
For a full explanation of access tokens, see how the Brightcove OAuth service works and Getting Access Tokens.
This sample shows you how to get an access token from a web app. Because the OAuth API is not CORS-enabled and requests must be made from the server side, the app sends information to a proxy, which then makes the API request and sends the response back to the client. The proxy here is written in PHP, but any server-side language will do - you just need to be able to send a POST request to the app over the internet.
Getting Credentials
To get a client_id and client_secret, you will need to go to the OAuth UI and register this app:
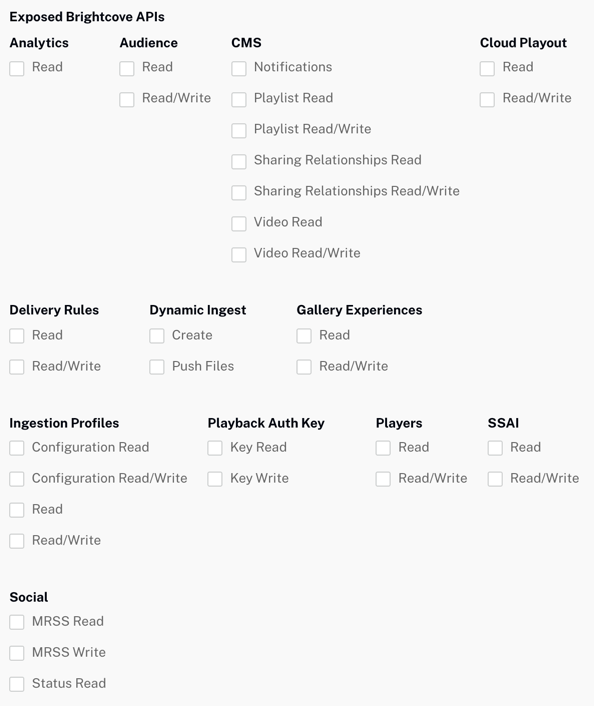
These choose the permissions you will need for the API you are going to use:
You can also get your credentials via CURL or Postman - see:
If you are getting credentials directly from the OAuth API, see API Operations for Client Credentials Requests for the permissions you need for different API operations.
Get access token app
Source code
Find all the code associated with this sample in this GitHub repository.
Sample app
See the Pen OAuth API Sample: Get an Access Token by Brightcove Learning Services (@rcrooks1969) on CodePen.
Using the CodePen
Here are some tips to effectively use the above CodePen:
- Toggle the actual display of the player by clicking the Result button.
- Click the HTML/CSS/JS buttons to display ONE of the code types.
- Click Edit on CodePen in the upper right corner to fork this CodePen into your own account.
- Find all the code associated with this sample in this GitHub repository.
Proxy code
In order to build your own version of the sample app on this page, you must create and host your own proxy. (The proxies used by Brightcove Learning Services only accept requests from Brightcove domains.) A version of the proxy code without the origin restrictions is shown below.
    <?php
    /**
     * access-token-proxy.php - proxy for Brightcove RESTful APIs
     * gets an access token and returns it
     * Accessing:
     *         (note you should *always* access the proxy via HTTPS)
     *     Method: POST
     *
     * @post {string} client_id - OAuth2 client id with sufficient permissions for the request
     * @post {string} client_secret - OAuth2 client secret with sufficient permissions for the request
     *
     * @returns {string} $response - JSON response received from the OAuth API
     */


    // CORS enablement and other headers
    header("Access-Control-Allow-Origin: *");
    header("Content-type: application/json");
    header("X-Content-Type-Options: nosniff");
    header("X-XSS-Protection");

    // note that if you are using this proxy for a single credential
    // you can just hardcode the client id and secret below instead of passing them

    $client_id     = $_POST["client_id"];
    $client_secret = $_POST["client_secret"];
    $auth_string   = "{$client_id}:{$client_secret}";
    $request       = "https://oauth.brightcove.com/v4/access_token?grant_type=client_credentials";
    $ch            = curl_init($request);
    curl_setopt_array($ch, array(
            CURLOPT_POST           => TRUE,
            CURLOPT_RETURNTRANSFER => TRUE,
            CURLOPT_SSL_VERIFYPEER => FALSE,
            CURLOPT_USERPWD        => $auth_string,
            CURLOPT_HTTPHEADER     => array(
                'Content-type: application/x-www-form-urlencoded',
            )
        ));
    $response = curl_exec($ch);
    curl_close($ch);

    // Check for errors
    if ($response === FALSE) {
        die(curl_error($ch));
        echo 'An error occurred';
    } else {
      echo $response;
    }

    ?>