Introduction
In this step-by-step document you will perform the following tasks:
- Create a player
- Update the player to autoplay the video
- Customize a player by adding a plugin
- Display the configuration for a player
Get started
The approach this step-by-step document takes is to use curl statements to communicate with the Player Service API. The curl tool is used at the command line to transfer data with URL syntax. More information about curl can be obtained from https://curl.haxx.se.
You certainly do not have to use curl as you do in this step-by-step document for simplicities' sake. You can, of course, use your favorite language to communicate with the APIs. Check out the Setup for Player Management Samples which demonstrates how to use OAuth, AJAX and JavaScript to write some mini-apps for basic tasks like creating a player, displaying all your players, deleting players, etc.
A few preliminary steps need to be taken before you can start using the API. These are:
- Login to Studio. If you have multiple accounts, use the drop-down to select the one in which you'd like to create your new players. For the credential system to work properly, you need to have admin rights on this account. If you are unsure if a user has admin rights, go to the Users Settings page to see Users listed along with their role.
- In Studio, be sure you have selected HOME from the lists of modules. In the top-left corner
of the page you, just below the account name, will be able to copy your Account ID.
- At the command line, enter the following to assign the Account ID value to an environment variable:
export ACCOUNT_ID=YourAccountID - Authentication will be handled using OAuth 2.0. First, obtain your client credentials (client_id and client_secret) as described in the OAuth Guide. Then, assign these values to environment variables:
export CLIENT_ID=YourClientID export CLIENT_SECRET=YourClientSecret - Get an access token using your client credentials:
          export ACCESS_TOKEN=$(curl -s --user $CLIENT_ID:$CLIENT_SECRET \
  --header "Content-Type: application/x-www-form-urlencoded" \
  --data "grant_type=client_credentials" \
  https://oauth.brightcove.com/v4/access_token | jq -r '.access_token')
You are now ready to start using the API.
Create a player
You can now create a player with a call to the Player Management API. This API call is explained in full detail in the Player Management API Overview document. It is suggested you copy and paste the following curl statements to the command line.
The following steps assist you in creating a player.
- The first curl statement creates the player and assigns a name and description. This uses OAuth authentication via the access token you generated earlier.
          curl \
            --header "Content-Type: application/json" \
            --header "Authorization: Bearer $ACCESS_TOKEN" \
            --request POST \
            --data '{
            "name": "My New Player Name v2",
            "description": "My new player description"
            }' \
            https://players.api.brightcove.com/v1/accounts/{{account_id}}/players
You will see the server returns response data in JSON format:
{ "id": "S1qN4xeG7", "url": "https://players.brightcove.net/1507807800001/S1qN4xeG7_default/index.html", "embed_code": "<iframe src='//players.brightcove.net/1507807800001/S1qN4xeG7_default/index.html' allowfullscreen webkitallowfullscreen mozallowfullscreen></iframe>", "embed_in_page": "https://players.brightcove.net/1507807800001/S1qN4xeG7_default/in_page.embed", "preview_url": "https://preview-players.brightcove.net/v2/accounts/1507807800001/players/S1qN4xeG7/preview/embeds/default/master/index.html", "preview_embed_in_page": "https://preview-players.brightcove.net/v2/accounts/1507807800001/players/S1qN4xeG7/preview/embeds/default/master/in_page.embed", "preview_embed_code": "<iframe src='//preview-players.brightcove.net/v2/accounts/1507807800001/players/S1qN4xeG7/preview/embeds/default/master/index.html' allowfullscreen webkitallowfullscreen mozallowfullscreen></iframe>" } - View your player by using one (or all) of the following values (at this point, there is no video in the
player, but you can publish a video using your newly created player using Studio):
- Copy the
urlinto a browser to see your player. - Copy the
embed_codeinto an HTML page to view your player in an iframe. For this to function properly, the page containing the iframe must be served from an actual HTTP server. - The
embed_in_pagefeature's use is detailed in the Available Options for the Advanced (in-page) Embed Code document.
- Copy the
Video Cloud videos
Of course you can create a player using a video from your Video Cloud library. Instead of using a media section in the JSON data, you use a video_cloud
section. The curl statement below shows player creation using a Video Cloud video's ID.
      curl \
        --header "Content-Type: application/json" \
        --header "Authorization: Bearer $ACCESS_TOKEN" \
        --request POST \
        --data '{
        "name": "Video Cloud CURL 10 March",
        "configuration": {
        "video_cloud": {
        "video": "4093372393001"
        }
        }
        }' \
        https://players.api.brightcove.com/v2/accounts/{{account_id}}/players
The response is logically equivalent to the response when creating a player using media/sources/src as shown above.
      {
        "id": "HJyMlHiuZ",
        "url": "https://players.brightcove.net/1507807800001/HJyMlHiuZ_default/index.html",
        "embed_code": "<iframe src="//players.brightcove.net/1507807800001/HJyMlHiuZ_default/index.html"
        allowfullscreen="" webkitallowfullscreen="" mozallowfullscreen=""></iframe>",
        "embed_in_page": "https://players.brightcove.net/1507807800001/HJyMlHiuZ_default/in_page.embed",
        "preview_url":
        "https://preview-players.brightcove.net/v1/accounts/1507807800001/players/HJyMlHiuZ/preview/embeds/default/master/index.html",
        "preview_embed_code": "<iframe
        src="//preview-players.brightcove.net/v1/accounts/1507807800001/players/HJyMlHiuZ/preview/embeds/default/master/index.html"
        allowfullscreen="" webkitallowfullscreen="" mozallowfullscreen=""></iframe>"
        }
You can see the player's configuration by browsing the URL value returned and change the index.html to config.json. For the player created by the curl statement above, you would see the following:
      {
        "account_id": "1507807800001",
        "compatibility": true,
        "embed_id": "default",
        "player": {
        "template": {
        "name": "single-video-template",
        "version": "6.5.0"
        }
        },
        "player_id": "HJyMlHiuZ",
        "player_name": "Video Cloud CURL 10 March",
        "updated_at": "2017-08-23T17:48:55.622Z",
        "video_cloud": {
        "policy_key":
        "BCpkADawqM2FnBS3InxzDxU4bd4otJdHKvexlXfhs_XgSj3jmBHAsV2xANIvSPd4KiakMbiQM5oYJPopOcJD7vNnPWGPGsnXCO3_ZGdjPmur53WV_a4JUPWHCLt5oiyekN44i24jZzHMB6hT",
        "video": "4093372393001"
        }
        }
The policy_key is automatically added to the player's configuration. This is created
using the Policy API, and it will allow for special restrictions to be placed on your player for accessing
different videos. In other words, the policy key controls which videos can be viewed when.
Update a player
You have now performed the basics for creating a player. Next, you will learn how to do a simple update of the player. In this case, you will set the player to autoplay the video in the player, if allowed by the browser.
- In the returned JSON from player creation an
idvalue was displayed. Copy this into aPLAYER_IDenvironment variable.export PLAYER_ID=YourPlayerID - To update the player you will use the HTTP
PATCHmethod. You will send data to update your player. You will set theautoplayoption totrue. Copy and paste the following curl statement and execute it.curl \ --header "Content-Type: application/json" \ --header "Authorization: Bearer $ACCESS_TOKEN" \ --request PATCH \ --data '{ "autoplay": true }' \ https://players.api.brightcove.com/v2/accounts/{{account_id}}/players/{{player_id}}/configuration - Check to be sure the server returns data which includes the
id,preview_urlandpreview_embed_codevalues in the following JSON format:{ "id": "S1qN4xeG7", "preview_url": "https://preview-players.brightcove.net/v2/accounts/1507807800001/players/S1qN4xeG7/preview/embeds/default/master/index.html", "preview_embed_in_page": "https://preview-players.brightcove.net/v2/accounts/1507807800001/players/S1qN4xeG7/preview/embeds/default/master/in_page.embed", "preview_embed_code": "<iframe src='//preview-players.brightcove.net/v2/accounts/1507807800001/players/S1qN4xeG7/preview/embeds/default/master/index.html' allowfullscreen webkitallowfullscreen mozallowfullscreen></iframe>" } - Use either the
preview_urlorpreview_embed_codevalues to see the changes in your player's configuration. You will see autoplay is now true. - Now you'll publish the player to push it to the correct location for users to view. Enter the following
command:
          curl \
            --header "Content-Type: application/json" \
            --header "Authorization: Bearer $ACCESS_TOKEN" \
            --request POST \
            https://players.api.brightcove.com/v2/accounts/{{account_id}}/players/{{player_id}}/publish
Once the player is published you will have players that differ from the preview versions. The published versions differ from the preview versions in these ways:
- The JavaScript and CSS are minified, concatenated and inlined into the player directly.
- A low resolution version of the poster image is generated and inlined into the page to improve perceived load times on networks with a high request-setup time (i.e. cellular data networks).
- The previous version of the player is saved so it can be recovered if problems are discovered after the update goes live.
- Check to be sure the JSON response from publishing the player appears as follows:
{ "id": "S1qN4xeG7", "url": "https://players.brightcove.net/1507807800001/S1qN4xeG7_default/index.html", "embed_code": "<iframe src='//players.brightcove.net/1507807800001/S1qN4xeG7_default/index.html' allowfullscreen webkitallowfullscreen mozallowfullscreen></iframe>", "embed_in_page": "https://players.brightcove.net/1507807800001/S1qN4xeG7_default/in_page.embed" } - Use one of the player implementations to be sure your published player is functioning correctly.
Customize a player
You can customize your player using plugins. You can learn how to include pre-existing plugins in your player or build your own in the Step-by-Step: Plugin Development.
In this case you will use a very simple pre-existing plugin to overlay a text message on the video. Following is the code for a plugin that creates an HTML paragraph tag. Note: a classname and text is assigned to the paragraph, then it is appended to the existing player. This plugin already exists for your convenience and is located at //solutions.brightcove.com/bcls/video-js/new-player/first-plugin.js.
      videojs.registerPlugin('firstPlugin', function() {
        var player = this,
        overlay = document.createElement('p');
        overlay.className = 'vjs-overlay';
        overlay.innerHTML = "First Plugin Working!";
        player.el().appendChild(overlay);
        });
The paragraph needs to be styled to prevent, in this particular instance, black text on a black background. The following are styles applied to the paragraph's classname. This stylesheet already exists for your convenience and is located at //solutions.brightcove.com/bcls/video-js/new-player/first-plugin.css.
      .vjs-overlay {
        background-color: #333333;
        color: white;
        font-size: 2em;
        padding: 5px;
        position: absolute;
        top: 100px;
        left: 20px;
        width: 150px;
        }
Just as you used a curl statement to assign the video source and poster image, you will use a curl statement to tell the player the following:
- Location of the JavaScript file that contains the code for the plugin
- Location of the stylesheet
- The plugin name to be used with the player
- Use the following curl statement to make the plugin functional.
curl\ --header "Content-Type: application/json"\ --header "Authorization: Bearer $ACCESS_TOKEN"\ --request PATCH\ --data '{ "scripts": [ "//solutions.brightcove.com/bcls/video-js/new-player/first-plugin.js" ], "stylesheets": [ "//solutions.brightcove.com/bcls/video-js/new-player/first-plugin.css" ], "plugins": [{ "name": "firstPlugin" }] }'\ https: //players.api.brightcove.com/v2/accounts/{{account_id}}/players/{{player_id}}/configuration - Use the following curl statement to publish the updated player. This is the same publish code that you used in
the previous section to publish a player.
curl \ --header "Content-Type: application/json" \ --header "Authorization: Bearer $ACCESS_TOKEN" \ --request POST \ https://players.api.brightcove.com/v2/accounts/{{account_id}}/players/{{player_id}}/publish - Copy the returned URL and browse it. You will see that the plugin is functioning and the plugin text is
displayed.
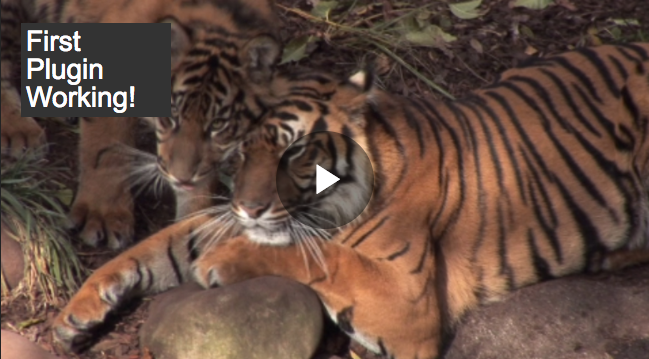
Plugin Text
When a plugin is added to the player using the Player Management API, be it a Brightcove supplied plugin or a custom plugin you have built, the plugin becomes part of the player code itself.
Display configuration
To debug and confirm work you have done it is often helpful to view a player's configuration.
- To do this, use a
GETmethod with theconfigurationURL.curl \ --header "Content-Type: application/json" \ --header "Authorization: Bearer $ACCESS_TOKEN" \ --request GET \ https://players.api.brightcove.com/v2/accounts/{{account_id}}/players/{{player_id}}/configuration - Check to be sure the JSON configuration response is similar to the following:
          {
            "media": {
            "poster": {
            "highres": "//solutions.brightcove.com/bcls/assets/images/Tiger.jpg"
            },
            "sources": [{
            "type": "application/x-mpegURL",
            "src": "//solutions.brightcove.com/bcls/assets/videos/Tiger.m3u8"
            }, {
            "type": "video/mp4",
            "src": "//solutions.brightcove.com/bcls/assets/videos/Tiger.mp4"
            }]
            },
            "compatibility": true,
            "video_cloud": {
            "video": "4093372393001",
            "policy_key":
            "BCpkADawqM3ugPRAtcx48_C4FjXiEiJORcRFnXkeL9siQUpauO_o7SaIhSnYvM24nUCeD74UFG1LMW8vtmaftsO1vYeeOn2iglfvEbG-c0PYwJ_zQCQGsvkrbgrNyEDvbEKjyrsQVXj0DOco"
            },
            "player": {
            "template": {
            "name": "single-video-template",
            "version": "6.7.0"
            }
            },
            "scripts": ["//solutions.brightcove.com/bcls/video-js/new-player/first-plugin.js"],
            "stylesheets": ["//solutions.brightcove.com/bcls/video-js/new-player/first-plugin.css"],
            "plugins": [{
            "name": "firstPlugin"
            }]
            }
Another way to get a look at the player's configuration is by browsing the URL value returned and change the index.html to config.json.
Delivery system APIs
The Delivery System APIs allow for the management and deployment of a group of files, called a repository. These files are managed through REST APIs and through git. These APIs shouldn't be needed by most people when creating or editing players, but they can be a very interesting set of APIs to use for other purposes. If you'd like to try them out, you can do so here. For a hands-on introduction, try out the Ste-by-Step: Delivery System document.